
 Search
River Raider TJ Expedition Snorkel Installed in a YJ
Page 1 of 1

River Raider TJ Expedition Snorkel Installed in a YJ
![]() RockOn93 Wed Dec 14, 2011 8:05 am
RockOn93 Wed Dec 14, 2011 8:05 am
For those of you that do not know, I had a 2003 TJ that I sold earlier this year and in return purchased a YJ. During that time I had procured an River raider Expedition Snorkel. I kept the kit and it is now rocking the YJ. Before I give a quick run down on the install many thanks go out to YJay92 for laying out the installation plan and cutting the holes. Thanks also go out to 92SquareEye who's own snorkel project inspired some of my project.
So here we go... We selected to go with the passenger side cowl mount for a few of reasons. 1) Personal perference on the look, 2) Out of the way, 3) Running the snorkel hose... more on that in a minute
Used a 3.25" Hole Saw... elected to go with rivets. For the record, I was chain smoking and pounding a berr when YJay92 placed the hole saw on the cowl. Used black door jam molding around the hole before placing the snorkel head mount into it...

Noe for reason 3) - elected to run the "long" hose from the River Raider kit through the hearter/fresh air intake. YJay92 placed the snorkel head mount in a fashion that kept the "vent" intact. So you can still blow hot air/fresh air through your vents. Now the air mass will be restricted do it this way but it still functions. Fresh air - In the words of 92SquareEye my jeep has "pretty boy" A/C...
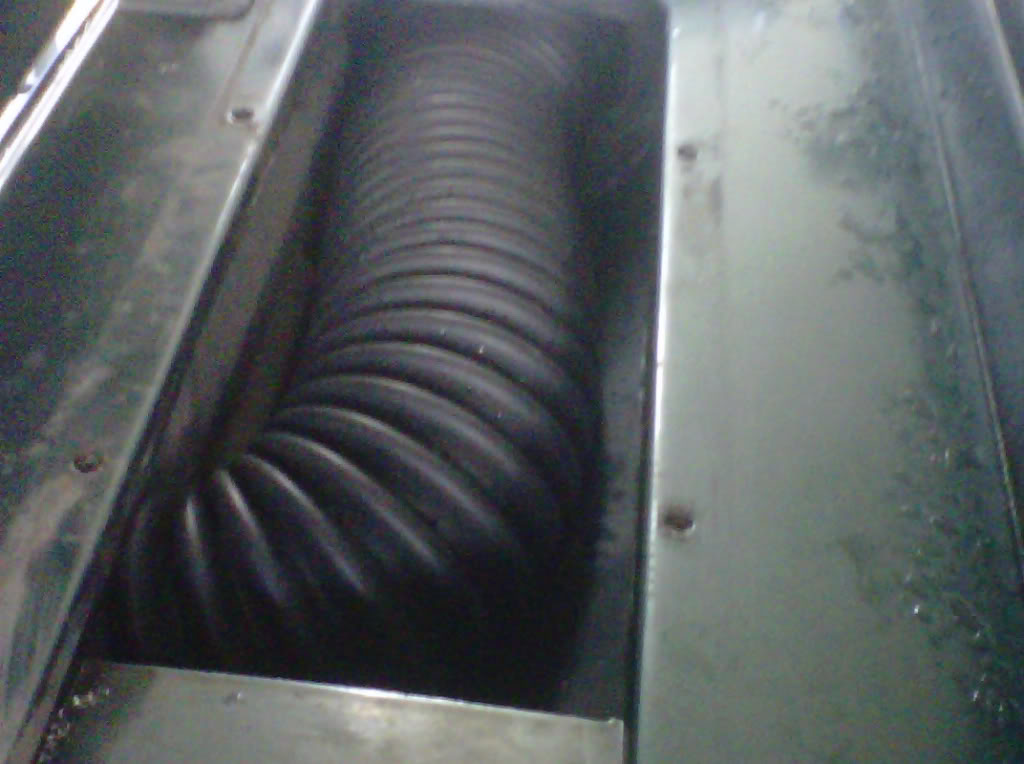
Now another well place 3.25" hole saw cut through the firewall by YJay92 to bring the hose from the vent box into the engine bay. Take your time here... Jay was skilled enough to cut this hole so that the very bottom of the hole saw came into the plastic vent box at the bottom seam perfectly. So water still drains normally. Door jam molding once again around the hole to protect the hose from chaffing. I used a Spectra 3" to "3 coupler. The coupler is 4" long and gives you plenty to work with...

Now seeing that I have more $ than skills I elected to purchase the River Raider airbox. This is an expense that can be avoided if you can fab your own. Me? Pull out the Master Card and get her done. I used 2 Spectra flex hoses to run from the firewall to the airbox to the intake. Used a Spectra coupler with vac line plugs on top of the intake. You will need a couple more Spectra 3" to 3" couplers to finish the job... you can see in the pics. And a bunch of hose clamps...


And the view from the outside...


I obviously left out a lot of little details... if you want more info feel free to hit me up. Hope you like it! (I really don't care if you do but thought it was a nice thing to say)
So here we go... We selected to go with the passenger side cowl mount for a few of reasons. 1) Personal perference on the look, 2) Out of the way, 3) Running the snorkel hose... more on that in a minute
Used a 3.25" Hole Saw... elected to go with rivets. For the record, I was chain smoking and pounding a berr when YJay92 placed the hole saw on the cowl. Used black door jam molding around the hole before placing the snorkel head mount into it...
Noe for reason 3) - elected to run the "long" hose from the River Raider kit through the hearter/fresh air intake. YJay92 placed the snorkel head mount in a fashion that kept the "vent" intact. So you can still blow hot air/fresh air through your vents. Now the air mass will be restricted do it this way but it still functions. Fresh air - In the words of 92SquareEye my jeep has "pretty boy" A/C...
Now another well place 3.25" hole saw cut through the firewall by YJay92 to bring the hose from the vent box into the engine bay. Take your time here... Jay was skilled enough to cut this hole so that the very bottom of the hole saw came into the plastic vent box at the bottom seam perfectly. So water still drains normally. Door jam molding once again around the hole to protect the hose from chaffing. I used a Spectra 3" to "3 coupler. The coupler is 4" long and gives you plenty to work with...
Now seeing that I have more $ than skills I elected to purchase the River Raider airbox. This is an expense that can be avoided if you can fab your own. Me? Pull out the Master Card and get her done. I used 2 Spectra flex hoses to run from the firewall to the airbox to the intake. Used a Spectra coupler with vac line plugs on top of the intake. You will need a couple more Spectra 3" to 3" couplers to finish the job... you can see in the pics. And a bunch of hose clamps...
And the view from the outside...
I obviously left out a lot of little details... if you want more info feel free to hit me up. Hope you like it! (I really don't care if you do but thought it was a nice thing to say)
RockOn93- Posts : 8
Join date : 2011-12-13
Location : Plantation, Fl
Page 1 of 1
Permissions in this forum:
You cannot reply to topics in this forum|
|
|